1- Navigate to “Sales” in the main menu and click on “Customers.”
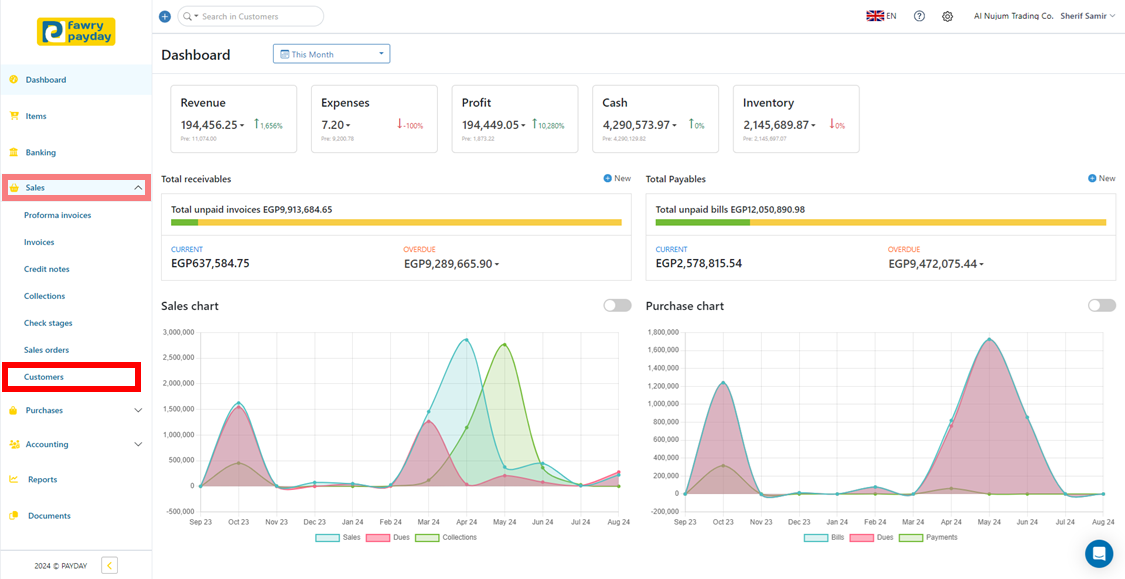
2- Click on "New" to start creating a new customer.

3- Fill in the required Customer details
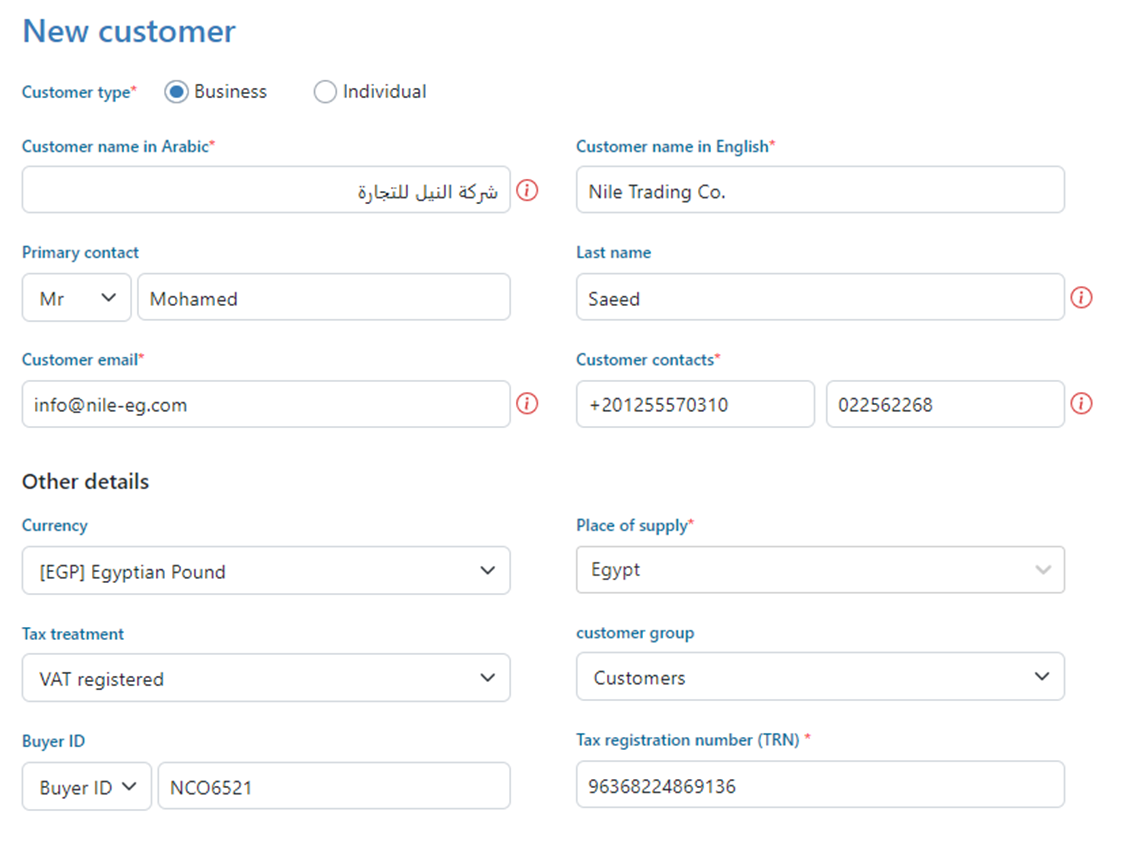
· Type: Specify whether the Customer is "Business" or an " Individual."
· Customer Name in [English / Arabic]: Enter the Customer name in both languages.
· Primary Contact: Provide the first name of the primary contact.
· Last Name: Provide the last name of the primary contact.
· Customer Email: Enter the customer’s email address.
· Customer Contacts: Enter mobile and telephone numbers.
· Currency: Select the currency used for transactions with the customer from the added currencies—see how to add currencies.
· Place of Supply: Specify the location where goods or services are supplied
· Tax Treatment: Select whether the customer is VAT registered from the options—see how to manage VAT.
· Tax registration number (TRN): If VAT registered, enter the tax registration number.
· Buyer ID: Enter the buyer's identification number.
4- Fill in the address details as follows:
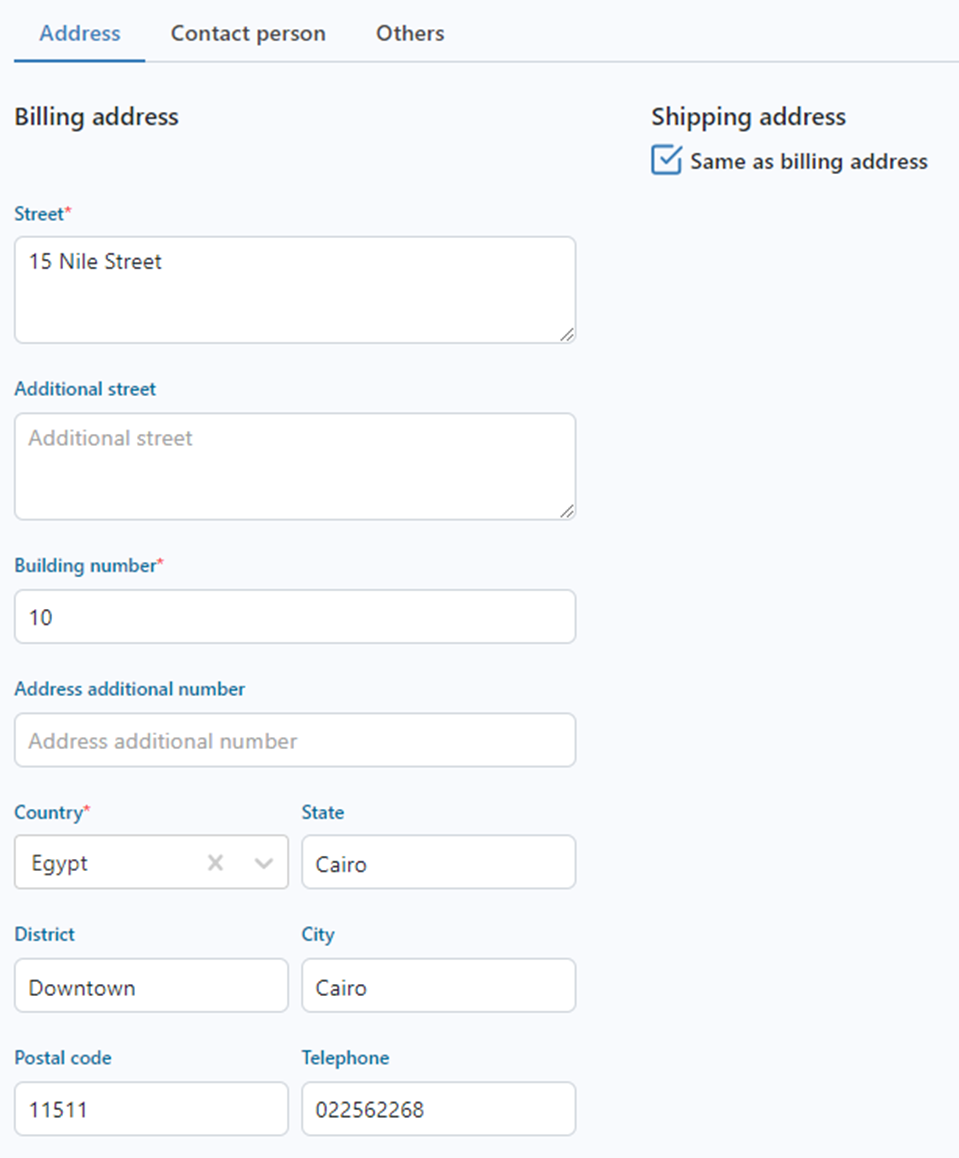
· Street: Enter the street name.
· Additional Street: Add any additional street description if needed.
· Building Number: Enter the building number.
· Address Additional Number Include any additional address details.
· Country: Select the country.
· State: Select the state.
· District: Enter the district name.
· City: Enter the city name.
· Postal Code: Enter the postal code.
· Telephone: Enter the telephone number.
· Shipping Address: If the shipping address differs from the billing address, uncheck the “Same as billing address” box (highlighted in the figure above) and fill in the shipping details.
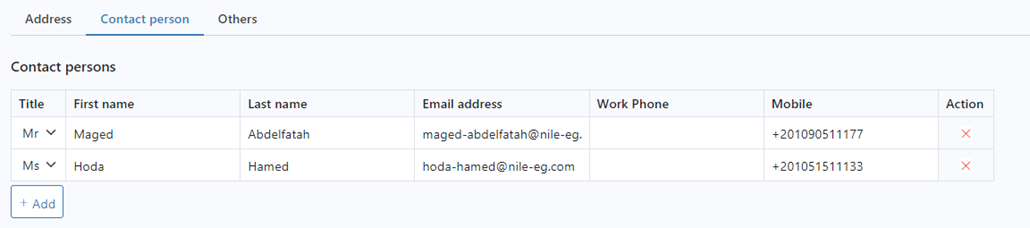
5- Fill in the contact person details as follows:
To add multiple contact persons, click on “Contacting Person,” then “Add,” and fill in the required data.
6- Fill in the others details as follows:
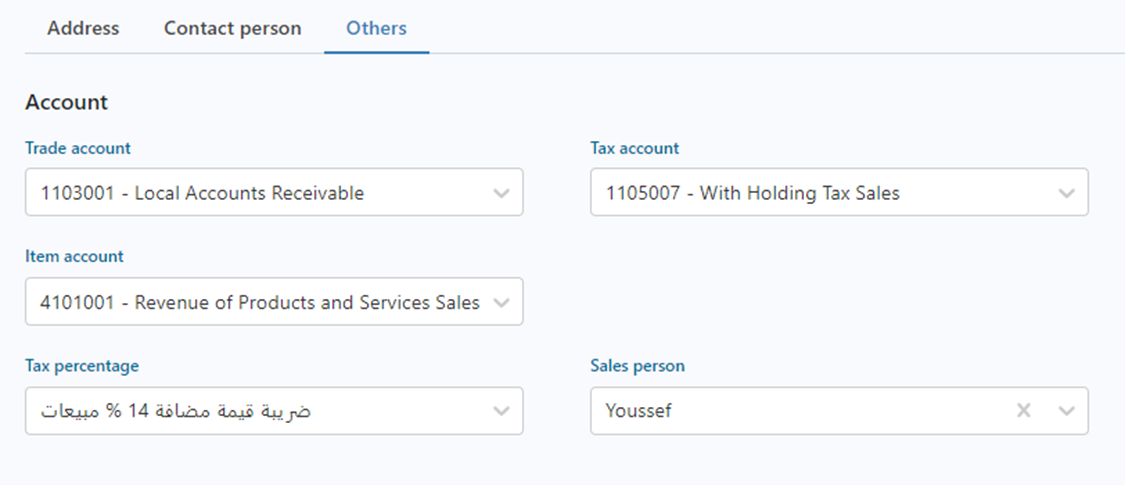
· Trade Account: Select the receivable account associated with the customer from the added accounts—see how to add accounts.
· Tax Account: Choose the tax account.
· Item Account: Select the revenue account where sales from this customer will be recorded.
· Tax Percentage: Specify the tax percentage applied to this customer.
· Salesperson: Choose the employee responsible for interacting with the customer from
the added employees—see how to add employees
7- Remark: use this field to enter customer-related notes for internal use.

8- Click Save
