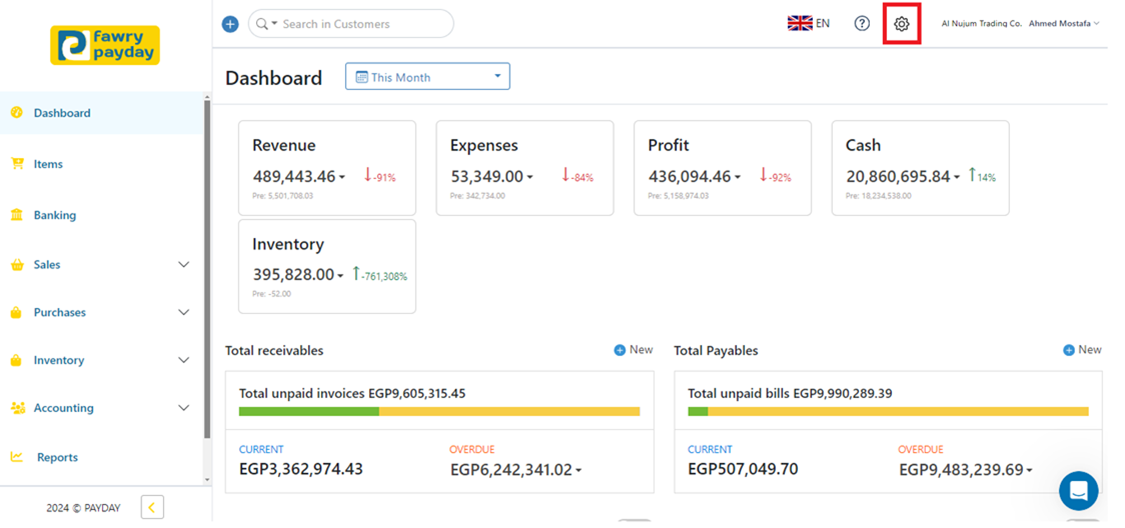
1- Navigate to the toolbar menu and click on the gear icon (Settings)
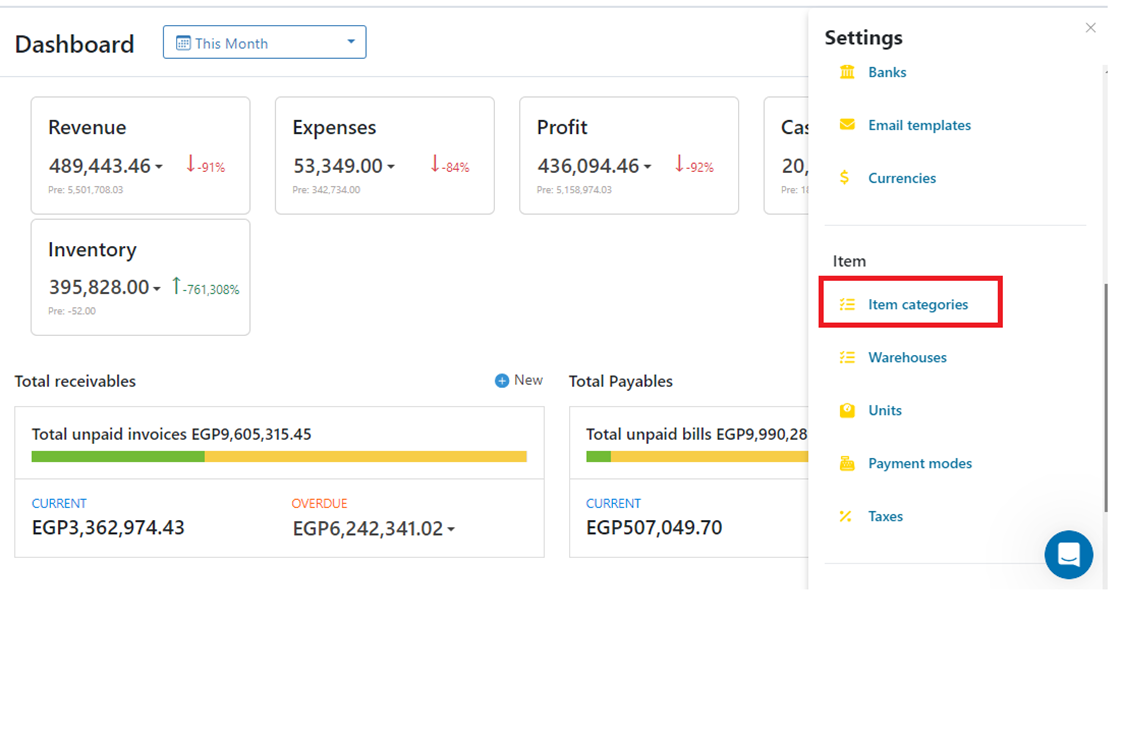
2- Scroll down to find “Item Categories” and click on it.
3- Click on “New” to begin creating a new item category.

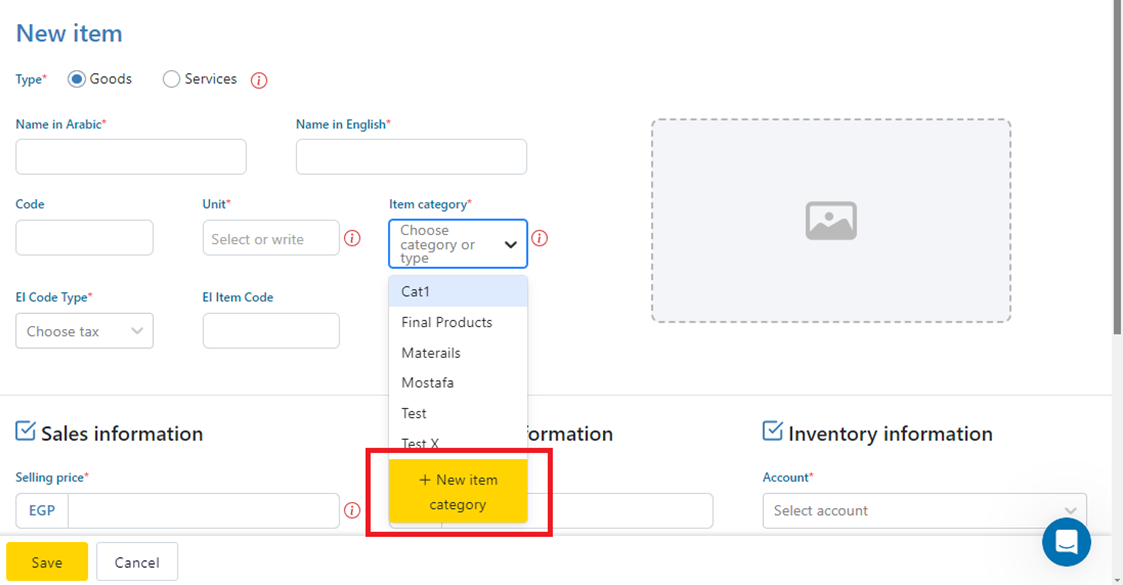
4- Alternatively, you can create a new item category directly from the item creation form by clicking on “New Item Category.”
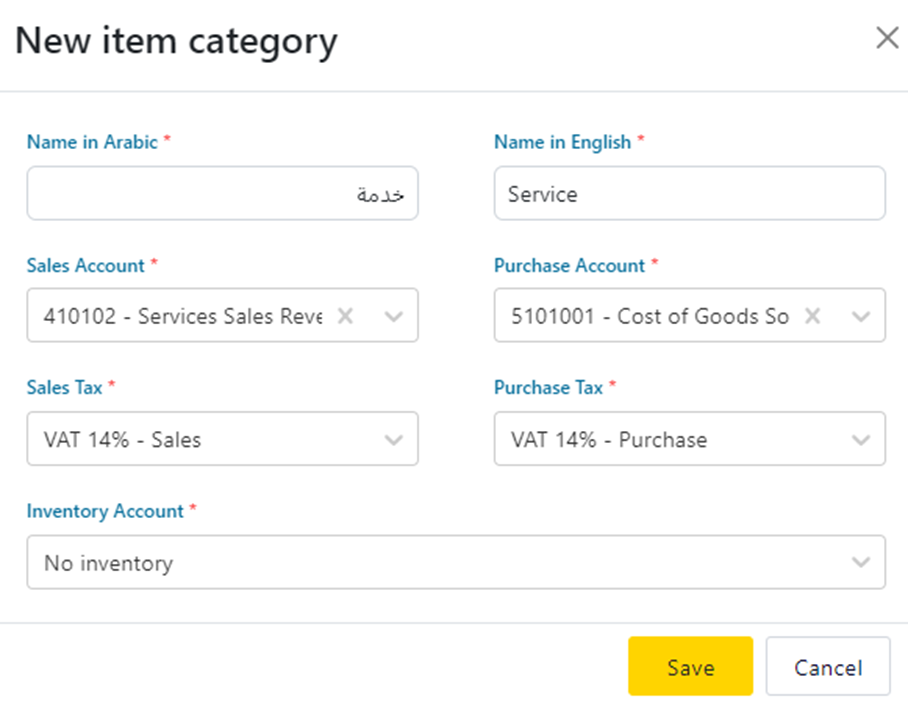
5- Fill in the required item details in the pop-up window that appears:
-
Name in [English / Arabic]: Enter the item category name in both languages.
-
Sales Account: Select the revenue account for recording sales (from the added accounts).
-
Sales Tax: Select applicable taxes for item category sales (from the added taxes).
-
Purchase Account: Select the account for recording purchase costs (from the added accounts).
-
Purchase Tax: Select applicable taxes for item category purchases (from the added taxes).
-
Inventory Account: Specify the account holding the inventory value (from the added inventory accounts).
6- Click on “Save”
Note: All items belonging to the same category will inherit the Accounts and Taxes defined at the category level, unless overridden at an individual item level.
- By following these steps, you can efficiently create a new item category with all necessary details